Google has recently introduced a new reinstatement process for suspended and disabled Google Business profiles. It’s currently being rolled out in the US and EU, it is expected to be rolled out globally in the coming months.
What Changed On Reinstatement Process
These are the main changes:
- Google will be forthcoming with the issue that suspended/disabled the profile, the guidelines are the same but the reason is explained in more detail. However, there may be other issues with the profile, so be sure to check the guidelines.
- You will need to use the new appeal tool.
- You will have to fill out the reinstatement form.
- You will have 60 minutes to upload the evidence (so get all the documentation ready before you start the process) after you submit the reinstatement form, this part is brand new, so don’t forget to click on the link to attach the evidence.
- You only have one chance to appeal, if the appeal is not approve I can still help
- You can track the status of your application using the appeal tools.
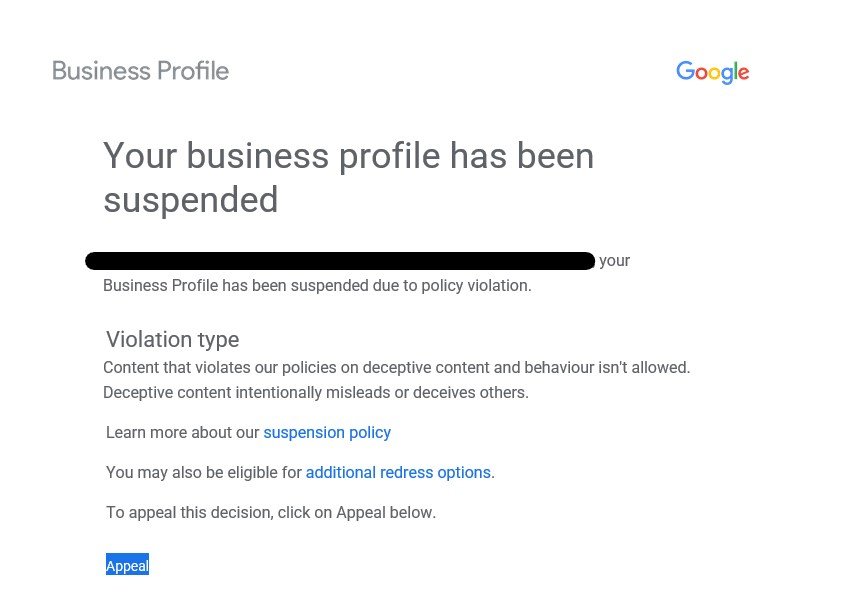
How you know you got suspended or disabled
You will receive an email like the one below:
Step by Step Reinstatement Process
- Open the Google Business Profile appeals tool. This is your dashboard for working on your appeal and checking the status of your appeal.
- Make sure you’re signed in to the Google Account associated with your business profile by verifying that the email is the correct email you use to manage the suspended GBP listing account, and then click Confirm.
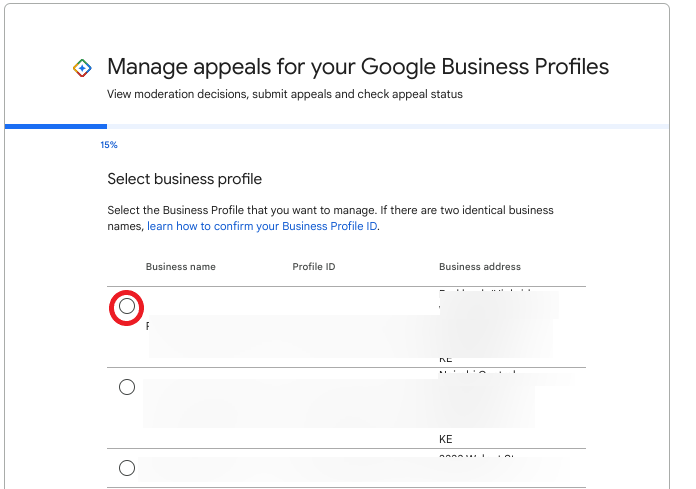
- Find and select the Google Business Profile you want to reinstate. If you only have one location, only the suspended location will appear, but if you’re an agency or have multiple Business Profile locations, you’ll need to select.
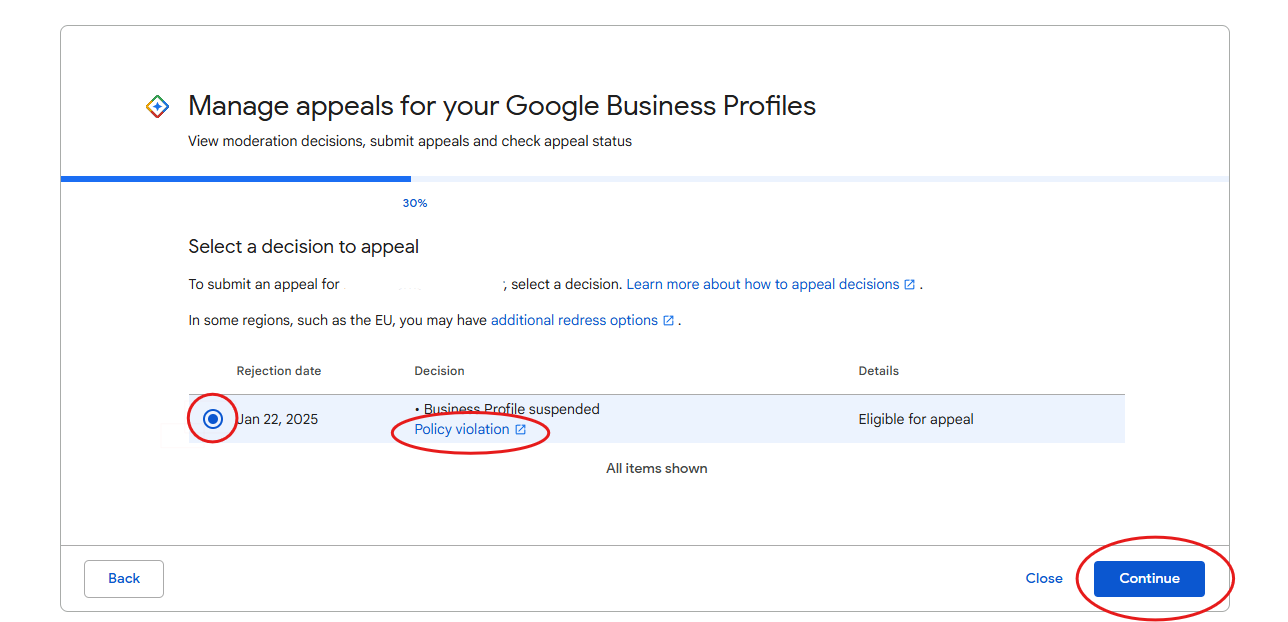
- On the next screen, the Google Business Profile Appeals tool displays the date and reason for the suspension or disabled action (under “Decision”), with a link to the guidelines. Click on the circle box on the left to select the appeal case and then at the bottom right, select “Continue”.
- On the next screen, you click Submit Appeal. After this screen, you will have exactly 60 minutes to assemble your business proof and upload it as per the warning message
- The next screen confirms that the appeal has been requested and asks you to add evidence to support your appeal. To add evidence, click the “add evidence” button.
- Upon pressing the add evidence button, the evidence form opens, you will see that it is pre-populated with your email address, business name, address and Google Business Profile ID. There are two file upload options available and text box for additional context.
- Google will review your appeal and send you an email with a decision. You can check the Appeals tool from time to time to see if the status has changed to Approved or Not Approved.
Step by Step Reinstatement Process Screenshots
Step 1 – Open the Google Business Profile appeals tool and Step 2 – Make sure you’re signed in to the Google Account
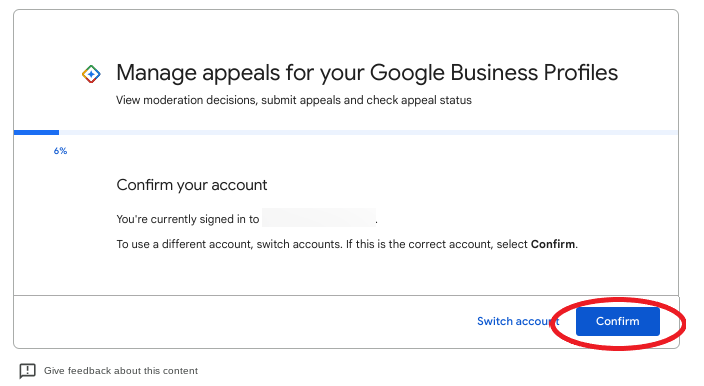
Step 3 – Find and Select the Google Business Profile that you want to reinstate
Step 4 – Google Business Profile Appeals Tool Individual Appeal
Step 5 – Appeal Submission Screen
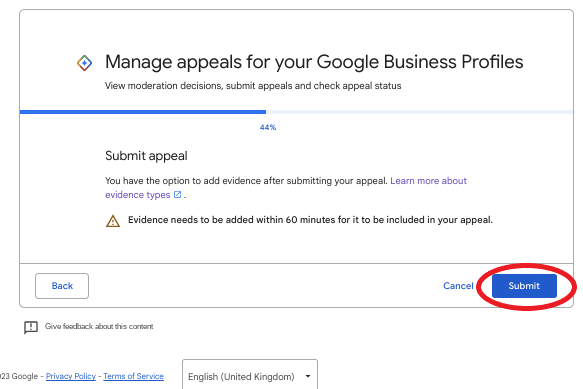
Step 6 – Appeal Confirmation Screen
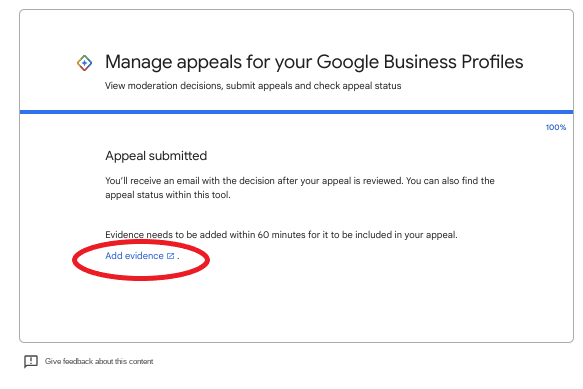
Step 7 – Evidence Form
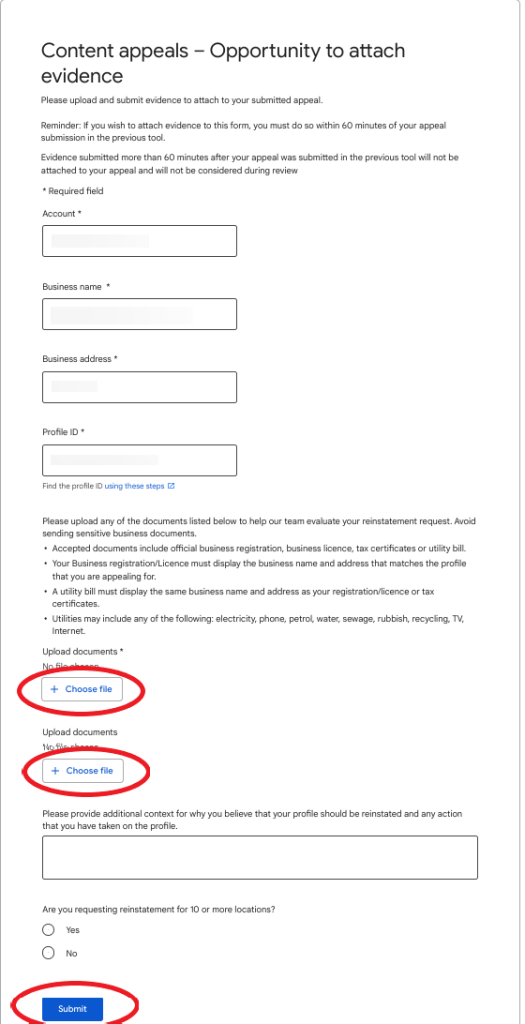
Step 8 – Appeal Decision
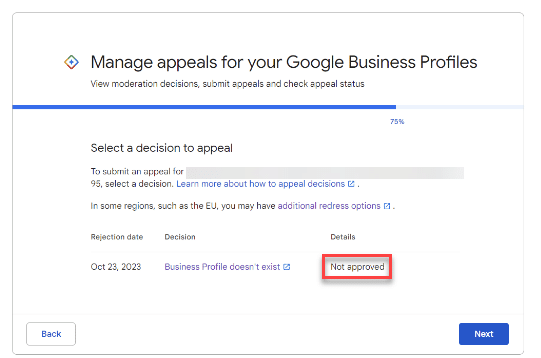
TIP – Prepare your evidence before starting the process of reinstatement.
Evidence that can help strengthen your appeal includes:
- Official business registration
- A business license
- Tax certificates
- Utility bills (electric, phone, cable, internet etc) for the business.
Appeal Not Approved
If your request for reinstatement is not approved, check this article: Google Business Profile: “your appeal has not been approved”
Conclusion
In summary, the new Google Business profile reinstatement process for suspended and disabled business profiles is a more streamlined and efficient process. It is important to note that you only have 60 minutes to provide proof of your business.
If you’re unsure about your evidence or the process, consider hiring a product expert to help you. Don’t proceed without expert guidance; the future of your business is at stake.
